REBOL Quick Start: Part 2 - REBOL Scripts
REBOL's Designer
Revised: 12-Mar-2024
The Plan
In the prior REBOL Quick Start you downloaded REBOL/View and ran some demos. But most importantly, you learned that you can get the source code to REBOL scripts, just like you do for HTML web pages. So, you now have access to hundreds of examples for learning more about REBOL.
In this article, let's look closer at the format for REBOL scripts and make a few custom changes to one.
An Example Script
Let's go back and look at the source code for the clock demo again.
REBOL [
    Title: "Digital Clock"
    Version: 1.3.3
    Author: "Carl Sassenrath"
    Purpose: {A simple digital clock.}
]

f: layout [
    origin 0
    b: banner 140x32 rate 1
        effect [gradient 0x1 0.0.150 0.0.50]
        feel [engage: func [f a e] [set-face b now/time]]
]

resize: does [
    b/size: max 20x20 min 1000x200 f/size
    b/font/size: max 24 f/size/y - 40
    b/text: "Resize Me"
    b/size/x: 1024 ; for size-text
    b/size/x: 20 + first size-text b
    f/size: b/size
    show f
]

view/options/new f 'resize
resize
insert-event-func [
    if event/type = 'resize [resize]
    event
]
do-events
In some ways, this is a fairly advanced script. Below, we'll trim it down to more of a beginner script, and make our own customizations for it.
Chop Chop
Let's chop that demo down to size. It turns out that most of the code is there to make the resize feature work, so let's remove that for now to make the example even simpler.
If you closed REBOL, start it again and open the clock demo source code. (As described in the prior REBOL Quick Start.)
You are now in the REBOL default editor. It's a really simple editor, but for this tutorial, it will do the job.
Edit the above script to delete all the lines from resize on down. Then add one new line "view f" as shown below:
REBOL [
    Title: "Digital Clock"
    Version: 1.3.3
    Author: "Carl Sassenrath"
    Purpose: {A simple digital clock.}
]

f: layout [
    origin 0
    b: banner 140x32 rate 1
        effect [gradient 0x1 0.0.150 0.0.50]
        feel [engage: func [f a e] [set-face b now/time]]
]

view f
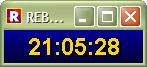
Now press CTRL-E to run the script with your changes. You should see:
If you mistyped something... let's say you typed:
viewf
you will see a REBOL error message pop up:
** Script Error: viewf has no value
** Near: viewf
Don't worry. No harm done. Go back and check that the script is identical to that shown above, make the corrections, and run it again. Do that until you get it working properly.
Just for now, while you are learning, if you get an error, go back and check that your code exactly matches the example. Pay attention to spaces and special characters.
Customize It
Let's customize the script, but first, let's change the top part of the script to make it truly yours. Change it to something like:
REBOL [
    Title: "My Clock"
    Version: 1.0.0
    Author: "My Name"
]
Verify your changes look similar to those above. Don't forget any of the [ ] : or " characters.
Note that the version should be 1.0.0 (2 dots) not 1.0 - we'll talk about why a bit later.
The Header
This top part of the script is called the REBOL header. Every REBOL script contains a header. If there is no header, REBOL will not run the script.
The header is important for a number of reasons. It identifies the text file to you, other users, and also to REBOL/View itself. It provides a title, a version, the name of the author, and you can add a lot more information as well, such as the date or copyright.
Click here for more about REBOL Headers.
Code Body
Following the header is the actual code of the script.
The code that begins with:
f: layout [
tells REBOL to run the layout function to create a graphical user interface (a GUI). The contents of the block (inside the [ ]) describe the GUI (just ignore that part for now, it is another dialect of REBOL -- a special shorthand notation for creating GUIs). The f: in front is a variable. You will see below how it is used.
At the bottom of the script, notice the line:
view f
This tells REBOL to display the GUI you created earlier. It calls the view function and passes to it the value of the f variable. That value is the GUI you created with the layout function. More on this later.
Change Colors
In the code above, change the line that looks like this:
effect [gradient 0x1 0.0.150 0.0.50]
to something like:
effect [gradient 0x1 150.0.0 0.0.150]
and run the script again (CTRL-E in the editor).
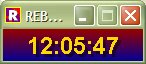
You will see that the background colors have changed.
What's 0.0.150?
The 0.0.150 is used to specify an RGB color value. We call such values tuples in REBOL. Each numerical part can range from 0 to 255, and for color tuples, the order of the numbers is red, green, and blue (as you would expect).
You may have noticed that RGB tuple value looks similar to the version number provided in the header. Good observation. Yes, version numbers are also tuples. Tuples are useful for a variety of purposes in programming.
If you want, you can read more about tuples here: REBOL Tuple values.
Change Effect
Now, let's make another change to the line:
effect [gradient 0x1 150.0.0 0.0.150]
Make it:
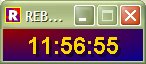
effect [gradient 1x1 150.0.0 0.0.150]
Run it, and you will see that the color gradient changes direction (diagonal now).
You can also try this change to make it horizontal:
effect [gradient 1x0 150.0.0 0.0.150 invert]
What are we changing anyway? It's called the effect dialect block. It specifies the type of effect you want for the graphics. A wide range of effects are possible.
Later, once you are more familiar with REBOL, we'll talk more about the concept of dialects, and how we use them to make programs a lot more powerful.
What's that 1x0 thing?
You may also be asking yourself, what is that 1x0 number? In REBOL it is used for specifying X and Y values, such as graphics positions or sizes. In REBOL, such values are called a pairs. The first integer is the X, and the second is the Y.
Here is more about REBOL Pair values.
Oh No! What Have You Done?
Did you notice... if you go back to the REBOL/View demos folder and click on the clock demo, you will see the clock with your changes. The original script is gone!
However, the 64 bit question is: does everyone on the Internet see your new script? Sorry, nope. You're safe. You only changed the file locally, the copy downloaded on your computer. No one else sees it.
This is useful to know. Just like HTML web pages. You can download some code, modify it, and view it again locally.
So, how do you get back the original code? Right click on the clock icon to get the information panel:

and click the Reload button.
But first you may want to save your local changes as a new file. To do that, open the script in the editor again, and this time, click on Save-As and save your script as "myclock.r" (or whatever).
Running A Script Directly
It turns out, you don't need to have REBOL/View running in order to run a REBOL script. For example, you can directly run your myclock.r script (saved above) from a normal folder icon.
Give that a try. But wait... where exactly is that myclock.r script on you hard disk?
Here is an easy way to find it. From the REBOL editor, click on Save-As again. Now, hit the "up one level" icon to see the demos folder icon. Right click on that and select "open" and poof. There are the local copies of all the demo scripts you have run so far.
If you double click the myclock.r icon, REBOL/View will open automatically and run the code. Try a few of the other demos.
Note that earlier you must have installed REBOL/View for REBOL to run when you click on a .r file.
Next: Writing Scripts
In the code above, you have seen the basic format of REBOL and how to make small changes to it.
In the next tutorial, I will show you how more experienced REBOLers write scripts: Quick Start: Writing Scripts.