REBOL/Express Link User's Guide

Express Beta 1 Version
Revised 23-August-2001
REBOL Technologies

Table of Contents

1. About this Document
2. Permissions Required
3. Managing Folders
      3.1. Creating a Folder
      3.2. Deleting a Folder
4. Managing Files
      4.1. Adding A File
      4.2. Deleting a File
      4.3. Updating a File
5. Managing File-Sets
      5.1. Creating a New File-Set
      5.2. Deleting a File-Set


1. About this Document

This preliminary document describes how to manage folders, files, and filesets from the Express Link client.

There are three was to manage folders, files, and filesets:

  1. From the Link Desktop by right clicking on icons and folders. This is the primary way that non-admin users will deal with files.
  2. From the File Admin utility. (A newer version to become available soon.) This is for administrators.
  3. By writing client-side admin scripts. (Allowing you to batch manage server operations from any enabled client.) This is for administrators who know how to write scripts.
As a User Guide, this document only covers the first of these three methods.


2. Permissions Required

In order to perform the Express file management operations described below you will need to be connected to the network, and you will need the necessary user account permissions.

Depending on your setup, not all users are allowed to add and remove files and folders. See the User Admin application in the Admin folder to examine and modify Express user permissions.


3. Managing Folders


3.1. Creating a Folder

To create a new folder on all user desktops, follow these steps:

  1. Open the folder into which you want to create your new folder.
  2. Right click anywhere on the backdrop for the folder. Do not right click on an icon. You will see this menu appear:
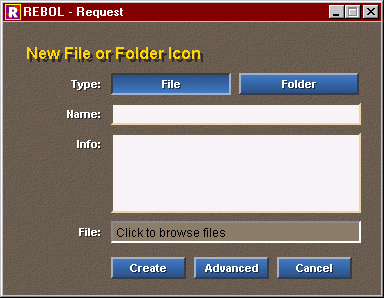
  1. Select the type Folder from the menu.
  2. Provide a name for your new folder. Keep it short, as long names will overflow the icon label.
  3. If desired, enter a short description for the folder.
  4. Click on the create button.
The folder will be created and will appear on all Link clients within a short period of time (usually about 10 seconds). If you do not see your new folder appear after a couple minutes, you do not have the administrative permissions necessary to create folders. Contact the user administrator.

Important Folder Note
In Beta 1, creating a folder on the Express desktop is not the same as creating a directory on your harddisk. Under Express folders are virtual directories. Creating a folder does not create a directory.

If you need a new directory, you must create that with your local file system. When you post a file from that directory to Express, the directory will be created across all clients simultaneously.


3.2. Deleting a Folder

To delete a folder from all user desktops, follow these steps:

  1. Open the folder you want to delete. Delete all files that you no longer want distributed to all users. If you do not do this step, the files will still be present but will be hidden from the desktop view.
  2. Click the folder path at the top of the folder area to move back one folder. Alternately, you can press the backspace key.
  3. Right click on the folder.
  1. Click on the delete button.
The folder will be deleted from all Link clients within a short period of time (a few seconds). If you do not see your new folder vanish after a couple minutes, then you do not have the administrative permissions necessary to create folders. Contact the user administrator.

Does Not Delete Files
In Beta 1, deleting a folder does not delete the files within it. They will still be present and remain synchronized, but will not appear on the desktop.

This approach can be used to create hidden files that do not appear on the desktop. For example, if you upload an HTML file that requires graphics images, this can be used to provide hidden graphics files.

If you want to delete the files, you must remove them before you delete the folder.


4. Managing Files


4.1. Adding A File

To create a file on all user desktops, follow these steps:

  1. Using your normal operating system file manager, copy or move your file to the Link directory (in the sandbox) where it should reside. This is done in the same way you copy or move all your other files. For instance, in Windows you can use the file Explorer.
  2. From within Link open the folder where you want to add your file.
  3. Right click anywhere on the backdrop for the folder. Do not right click on an icon. You will see this menu appear:
  1. Select the type File from the menu.
  2. Click on the file field. Select the file that you copied earlier, and click the select button at the lower right of the file requestor.
  3. The name of the file will appear in the name field. This is the name that will appear on the Link desktop. You can change the name if you desire. However, Keep the name relatively short; long names will overflow the icon's name label when it appears on the desktop.
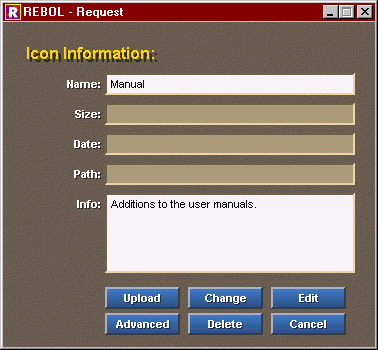
  4. Provide a description for the icon. Make it useful.
  5. If desired, enter a short description for the file.
  6. Click on the create button and wait a few seconds for the file to upload to the server. If it is a large file, and you are running on a slow connection, you may need to wait for a few minutes while the file uploads.
The file will be created and will appear on all Link clients within a short period of time. If you do not see your new file appear after several minutes, then you may not have the administrative permissions necessary to create files. Contact the user administrator.


4.2. Deleting a File

To delete a file from all user desktops, follow these steps:

  1. Right click on the file's icon.
  2. Click the Delete button.
The file will be removed from all desktops within a short period of time. If you do not see your new file appear after several minutes, then you may not have the administrative permissions necessary to create files. Contact the user administrator.

Files Remain on Disk
Deleting a file from the desktop does not delete the file from user's hard drive. It simply removes the file from the desktop view. The file is still present on all Link user systems. Thus, you can add the file back to the desktop by following the icon creation instructions above.


4.3. Updating a File

If you modify a file and want to update everyone's copy of the file, follow these steps:

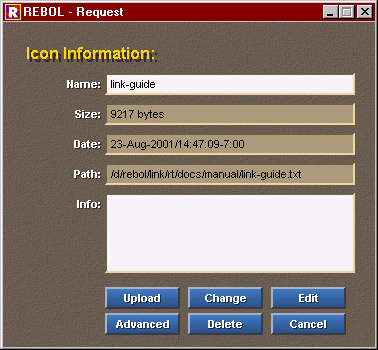
  1. Right click on the icon for your modified file.
  2. Click on the Upload button and wait a few seconds for the file to upload to the server. If it is a large file, and you are running on a slow connection, you may need to wait for a few minutes while the file uploads.
The file will be uploaded on all Link clients within a short period of time. If this does not happen, then you may not have the administrative permissions necessary to create files. Contact the user administrator.


5. Managing File-Sets


5.1. Creating a New File-Set

To create a new file-set:

  1. Open any folder.
  2. Right click anywhere on the backdrop for the folder. Do not right click on an icon. You will see this menu appear:
  3. Click on the Advanced button. The menu will be extended.
  1. Click on New Fileset.
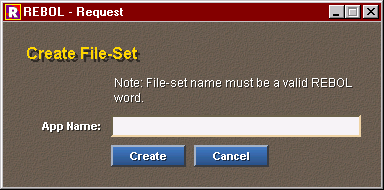
  1. Provide a name for your new file-set. The name must be a valid REBOL word. It may contain alpha-numeric characters and dashes "-" but should not have spaces, (), [], or other characters.
  2. Click on the Create button.
The file-set will be created. You can now add files to this file-set in the same way that you add normal files.


5.2. Deleting a File-Set

Warning!
Deleting an application will remove all of its tags and files from the server and all clients. Do not delete an application unless you you are sure.

  1. Open any folder.
  2. Right click anywhere on the backdrop for the folder. Do not right click on an icon. You will see this menu appear:
  3. Click on the Advanced button. The menu will be extended.
  4. Select Delete File-set from the menu.
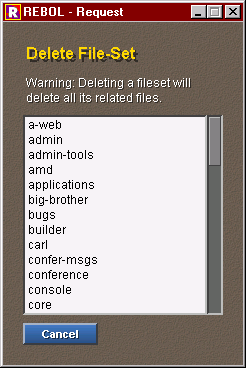
  1. Pick the file-set that you want to delete.
  2. A request will pop-up asking you to confirm the deletion.
The file-set will be deleted. All files that are part of the fileset will be removed from Link. Note that File-Set deletion is similar to file deletion. The files will not be deleted from your hard disk. But they will not be synchronized by Link and will not appear in the desktop.


Copyright REBOL Technologies. All Rights Reserved.
REBOL and the REBOL logo are trademarks of REBOL Technologies.
Formatted with REBOL Make-Doc 0.9.4 on 23-Aug-2001 at 15:03:37